Monday, November 21, 2016

Round Lace Net Weave - Learn How

The Round Lace Net Stitch is worked in Rounds and can be applied to many different patterns. This is just a basic tutorial on how to do the stitch using only 2 colors of seed beads.
R = Round
Each Round begins at the red dot in drawing

Below is the word chart for working this pattern. This is the kind of chart that is used for net circular beadwork. In this tutorial I have all the steps that are worked in the word chart and I have also included illustrations. When you work with larger beadwork with long patterns usually you will not have all these illustrations. The patterns will only have the word chart. This pattern shows you how a word chart is worked. This should help you if you ever want to tackle a pattern that has lots of Rounds.

When working on your piece, keep your tension snug but not too tight.

(˄) means to go through the center bead in the next loop forward
You will be repeating each step around until the end of the Round.

After each Round you will be going forward through 2 beads
to start the next Round, unless if there is a special note.

Please follow the illustrations for a feeling on how the word chart is written in relationship to how the beads will be added.

in 2 means go with working thread in the second bead of the next loop
skip over 1 means skip over 1 bead and go with thread through the next bead

The Pattern
Starting Round,
Pick up 8a, make a ring by going with thread through the 1st a bead just added. Continue with working thread around through all 8 beads again, plus go through the 1st bead again.

 1.  5b, skip over 1
 2.  3a skip over 1, 3a in 2
 3.  5b˄
 4.  3a skip over 1, 3a in 2
 5.  3b˄
 6.  3a˄, 5a˄


All these patterns below use the Round Lace Net Weave Stitch...

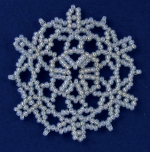
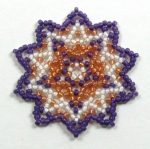
Little Star Ornament Pattern

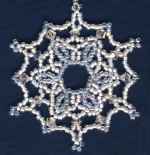
  Golden Ornament Pattern

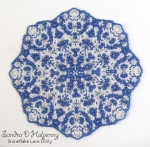
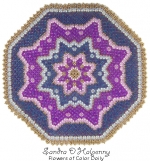
  Flowers of Color Doily Pattern

Friday, October 14, 2016

Half Round Lace Bracelet pattern


This cute little bracelet is based on my "Round Lace Bracelet" Pattern. You can probably make it in half the time because it is half the bracelet. I have also included step-by-step instructions on how to do the simple closer. No need to run out and get a metal closure. You can easily make it with the same beads you used for your bracelet.


A = Miyuki, 11° SEED beads
B = 4mm Fire-polished crystals

Start by waxing and stretching your thread, use Nymo D or C-Lon & a #11 or #12 beading needle. I used Fireline 6lb. crystal.  Tie in a "stopper" bead, leaving about an 12" tail and begin at step #1.
 
1. Pick up 1B, 17A, go with thread forward through the 1 B bead and the 1st through 9th A beads just added.
2. Pick up 11A, go with thread up through the 9th A bead, step #1 (first time) or the 6th A bead, step #5 (every time after) and forward through the 1st, 2nd, 3rd and 4th A beads just added in this step.
3. Pick up 7A, go with thread forward through the 4th and 5th A beads, step #2.

4. Pick up 4A, go with thread down through the 5th, 6th and 7th A beads, step #3, and forward through the 5th and 6th A beads, step #2.
5. Pick up 8A, go with thread down through the 3rd, 2nd and 1st A beads, step #4, and forward through the 6th and 7th A beads, step #2.
6. Pick up 4A, go with thread down through the 3rd, 2nd and 1st A beads, step #5, and forward through the 7th and 8th A beads, step #2.
7. Pick up 4A, go with thread down through the 3rd, 2nd and 1st A beads, step #6, and forward through the 8th and 9th A beads, step #2.
8. Pick up 1B, go with thread right to left through the 3rd A bead, step #2, down through the B bead just added and forward through the 9th, 10th and 11th A beads, step #2. Continue with working thread through the bracelet, coming out with thread up through the 6th A bead, step #5.


9.
Continue bracelet by repeating steps #2 through #8 until you reach the length that you want.


10. Continue with working thread up through the 6th A bead, step #5.
Pick up 8A, go with thread down through the 7th, 6th and 5th A beads added in the last repeat of step #5, and forward through the 1st through 5th A beads just added.
11. Pick up 2A, go with thread down through the 4th and 5th A beads added in the previous step and up through the 2 A beads just added.

12. Pick up 1B, 1A, go with thread down through the B bead just added, and the 4th and 5th A beads, step #10.
13. Pick up 1B, 1A, go with thread up through the B bead just added, and the 2 A beads, step #11.
14. a) Pick up 5A, go with thread through the 1 A and down through the B beads, step #12, and down through the 2 A beads, step #11. b) Pick up 5A, go with thread through the 1 A and up through the B beads, step #13, and through the 5th through 1st A beads, step #10. Weave the working thread into the bracelet and end.

Half Round Lace Bracelet pattern, B0275

http://www.SandraDHalpenny.com
Sandra D. Halpenny  2016 All rights reserved
This pattern may not be copied or distributed in any way without the express written permission of the author. No mass production of this design is permitted without permission from the author.

Thursday, September 29, 2016

Snowflake #70 Ornament Pattern


Lots of sparkle in this snowflake Ornament. It's made using lots of Swarovski crystals. It would make a special gift for yourself or a friend.


Start by waxing and stretching your thread, use Nymo D or C-Lon & a #11 or #12 beading needle. I used Fireline 6lb. crystal.  Tie in a "stopper" bead, leaving about an 12" tail and begin at step #1.

R = Round

Each Round begins at the red dot in drawing


Round 1
Pick up 6A, go with fishing line forward through the 1st A bead just added.

Round 2
a) Pick up 2B, 1A, 1C, 1A, 2B, go with fishing line left to right through 2 A beads in R1.
b) Pick up 2B, 1A, 1C, 1A, go with fishing line down through the 2nd and 1st B beads added in (a), and left to right through 2 A beads in R1.
c) Pick up 2B, 1A, 1C, 1A, go with fishing line down through the 2nd and 1st B beads added in (b), and left to right through 2 A beads in R1.
d) Repeat (c) around 2 more times.
e) Go working line up through the last 2 B beads added in this Round at (a).
Pick up 1A, 1C, 1A, go with fishing line down through the 2nd and 1st B beads added in the last repeat of (c), left to right through 1 A bead in R1, up through the last 2 B beads added in this Round at (a), right to left through the 1st A and 1 C beads just added in this step.
 

Round 3
a) Pick up 1B, 1E, 1A, 1C, 1A, 1E, 1B, go with fishing line right to left through the 1 C bead, 2 A and the 1 C beads added in Round 2.
b) Repeat (a) around 5 more times.
c) Continue with working fishing line up through the 1 B, 1 E and 1 A beads in the first repeat of (a) this Round.
 

Round 4
a) Pick up 1B, 3E, 1B, go with fishing line down through the 2nd 1 A and 1 E beads, R3.
b) Pick up 1D, go with fishing line up through the 1st 1 E and 1 A beads, R3.
c) Repeat (a, b) around 5 more times.
d) Weave the working thread into the snowflake and end.
 

Snowflake #70 Ornament Pattern
http://www.SandraDHalpenny.com
Sandra D. Halpenny 2007 - 2024 All rights reserved
This pattern may not be copied or distributed in any way without the express written permission of the author. No mass production of this design is permitted without permission from the author.

Friday, September 2, 2016

Snowflake stitch exploration - Learn How


This pattern is inspired by my snowflake patterns. The stitch has been used in almost all my snowflake patterns. Usually I use this stitch in the Round with a circle of 3, 5 and 7 beads, with the top bead, added after the even round of beads of 2, 4 or 6, for a point or to attach the next round. I have also used this with my necklace patterns in a similar form. 

When working on my exploration of the stitch, I added a variation taking out the horizontal beads. This helps the piece to lay flatter. Great for making a bracelet. It gives it a different look too. I think doing this version would be more versatile too for styling other patterns  

I started this tutorial a couple of years ago and lost the file. I recently found the pattern again and decided to put it here on my free pattern blog. This design is done flat rather than working in a Round as the snowflakes are worked. This design it is very flexible because you can mix amounts of your base with the 3, 5 or 7 beads (I will show you in a later photo). 

In the future I hope to have some patterns designed using this snowflake stitch. If you have any ideas please email me and I will post them here and at Facebook.

It could also need a name. Any ideas?


A = Miyuki, 11° SEED beads, any color
B = Miyuki, 11° SEED beads, any color

Start by waxing and stretching your thread, use Nymo D or C-Lon & a #11 or #12 beading needle. I used Fireline 6lb. crystal.  Tie in a "stopper" bead, leaving about an 12" tail and begin at step #1.
 

1. Pick up 5A, go with thread forward through the 1st, 2nd and 3rd A just added.
2. Pick up 1B, go with thread down (forward) through the 4th, 5th and 1st A beads, step #1.

3. Pick up 2B, 5A, go with thread forward through the 1st, 2nd and 3rd A just added.

4. Pick up 1B, go with thread down (forward) through the 4th, 5th and 1st A beads, step #3.

5. Continue by repeating steps #3 and #4 for the width that you would like.


6.
Pick up 4A, go with thread left to right through the B bead in the previous row and up through the 1st and 2nd A beads just added.
7. Pick up 1B, go with thread down (forward) through the 3rd and 4th A beads, step #6, and left to right through the B bead in the previous row as shown.


8.
Pick up 2B, go with thread left to right through the next B bead in the previous row as shown.


9.
Pick up 4A, go with thread left to right through the B bead in the previous row and up through the 1st and 2nd A beads just added.
10. Pick up 1B, go with thread down (forward) through the 3rd and 4th A beads, step #9, and left to right through the B bead in the previous row as shown.


11.
Continue by repeating steps #8, #9 and #10 to the other end.


12.
Pick up 4A, go with thread right to left through the B bead in the previous row and up through the 1st and 2nd A beads just added.


13.
Pick up 1B, go with thread down (forward) through the 3rd and 4th A beads, step #12, and right to left through the B bead in the previous row as shown.

14.
a) Pick up 2B, go with thread right to left through the next B bead in the previous row as shown. b) Pick up 4A, go with thread right to left through the B bead in the previous row and up through the 1st and 2nd A beads just added.


15.
Pick up 1B, go with thread down (forward) through the 3rd and 4th A beads, step #14a, and right to left through the B bead in the previous row as shown.


16.
Continue by repeating steps #14a, #14b and #15 to the other end.
17. Continue rows by repeating steps #8 through #16 until you reach the length the yuo would like.
18. After completing your final row and a row of 2 B beads between the picot beads in the last row.


1. Pick up 5A, go with thread forward through the 1st, 2nd and 3rd A just added.
2. Pick up 1B, go with thread down (forward) through the 4th and 5th, step #1.
3. Pick up 5A, go with thread forward through the 1st and 2nd A just added.
4. Pick up 1B, go with thread down (forward) through the 3rd and 4th A beads, added in the last step.
5. Continue by repeating steps #3 and #4 for the width that you would like.

Following the green dotted line in illustration, go with thread up and forward through the 5th, 1st and 2nd A beads, and left to right through the 1 B bead as shown.


6.
Pick up 4A, go with thread left to right through the B bead in the previous row and up through the 1st and 2nd A beads just added.


7.
Pick up 1B, go with thread down (forward) through the 3rd and 4th A beads, added in the last step.
8. Pick up 4A, go with thread left to right through the B bead in the previous row and up through the 1st and 2nd A beads just added.
9. Pick up 1B, go with thread down (forward) through the 3rd and 4th A beads, added in the last step.
10. Continue row by repeating steps #8 and #9 to the other end.

Following the green dotted line in illustration, go with thread up and forward through the B bead in the previous row, the 1st and 2nd A beads, and right to left through the 1 B bead as shown.


11.
Pick up 4A, go with thread right to left through the B bead in the previous row and up through the 1st and 2nd A beads just added.

12. Pick up 1B, go with thread down (forward) through the 3rd and 4th A beads, added in the last step.
13. Pick up 4A, go with thread right to left through the B bead in the previous row and up through the 1st and 2nd A beads just added.
14. Pick up 1B, go with thread down (forward) through the 3rd and 4th A beads, added in the last step.
15. Continue row by repeating steps #13 and #14 to the other end.

Following the green dotted line in illustration, go with thread up and forward through the B bead in the previous row, the 1st and 2nd A beads, and left to right through the 1 B bead as shown.
13. Continue your piece by repeating steps #11 through #15 until you reach the length that you would like.
This sample shows the different amount of beads in the row and what it looks like.


New Page 1